E-Newsletter Signup
For special offers, updates and news of new products join our newsletter.
GUEST BLOGGER
If you would like to contribute to our blog as a guest and can bring fresh outdoor experiences, please:
How do I attach a Drive Away Awning to my Van?
Posted in Camping Tips & Ideas / FAQs / How To / Motorhomes & Caravans on 7th December 2018
If you have a Campervan or Motorhome and want to add an extra bit of living space at the campsite then you need a Drive Away Awning.
A Drive Away Awning is really just a tent with a small tunnel attached which fixes onto your vehicle, usually by means of a beaded strip which you connect to the gutter rail / fixing rail on your vehicle (or by one of the other methods listed below)
Once set up, you are then free to easily disconnect and reconnect the awning… and drive away. Leaving the awning freestanding at the campsite, without the need to dismantle it, or put away your Camping Furniture and paraphernalia every time you venture off to explore the local area.
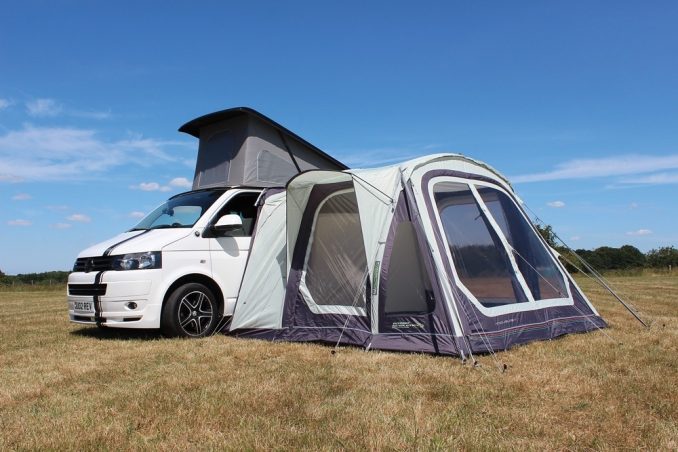
In recent years Drive Away Awnings have become very popular and are a familiar sight at campsites up and down the country. Most of them are lightweight and simple and easy to erect and they’re a great value add-on to create extra storage space.
Whether you want to set up your table and chairs and use it as a dining area, empty your jam packed camper in there to create a bit of space, or use it as an extra bedroom (some come with built in or optional extra bedroom pods), we find that most Campervanners and Motorhomers now prefer to use one when they rock up at the campsite.
How do I know what size awning to get?
The attachment height is the most relevant dimension that you need to worry about. Most Vehicles will have a gutter rail or awning rail. You simply need to measure the height from the ground to the rail. Make sure you do this on flat level ground to get the most accurate measurement.
If you don’t have a rail on your van you can buy one, or if you don’t want to do that then there are other methods of fixing it to the van ( We’ll get to those shortly )
When you browse our Drive Away Awning Section and select an awning to look at, just click on the ‘Specifications’ tab on your awning of choice to check the attachment height range of that Awning. There’s normally a fair amount of leeway. Most awnings will fit a VW T4, T5 or T6 / Mazda Bongo size van, but always check before buying, especially if you have a larger motorhome.
Our Drive Away Awning section is split into two main sections, Pole Drive Away Awnings and Air Drive Away Awnings. Whichever version you decide is right for you just click on the relevant section (try it on one of the links here) and to the left of the page you will see this;
Category
-
- Low ( 180cm – 210cm )
- Std ( 180cm – 240cm )
- High ( 240cm – 295cm )
- Free Standing
Once you have measured the height from the ground up to your rail or Fiamma awning just click on the section that matches your height. If your vehicle is between 180cm and 210 then you can chose between either the Low or Standard sections. The Standard height awnings are made to cover a wider height range of vehicles, the only difference will be that there will be a bit more excess material to be gathered up in the tunnel area. There are usually straps/toggles/velcro to gather this material up to tidy it up.
If you have a low vehicle such as a VWT5 and are only planning to use it on that van then an awning from the ‘Low’ section will be perfect for you as there will be minimal slack material left in the tunnel area. If you have more than one vehicle or think you may change your vehicle in the near future and want to keep your attachment height options open then choose one from the Standard section.
If you have a high vehicle, only select an awning from the ‘High’ section.
_________________________________________________
What is a Free Standing Awning?
A couple of Free Standing awnings have appeared in the marketplace recently, the newest being the Outwell Milestone Nap These awnings are free standing, more like a tent, however they are designed and shaped more like an awning and have a zip door at the front and rear (next to the vehicle door). There is no tunnel area on these, just an ‘eyebrow’ section which you pull your van up close to.
If you don’t want the bother of attaching the awning to the van at all but still want to be able to step quickly between the van and an awning then this one is for you… in which case read no further as you don’t need to fit it to the vehicle!
How do I fix my Awning to my vehicle?
There are various ways of attaching your awning to your vehicle. You will have to be flexible with this depending on what rails and fittings your van has.
Most awnings have loops or straps at either end of the connecting strip which you can use to fix to roof bars or to attach guylines to and peg down on the other side of the van. This may be sufficient in some cases, but if you want a more secure and weatherproof solution there are several options.
The main methods are as follows.
Vehicles with bulit in Awning Channel or Awning Rail
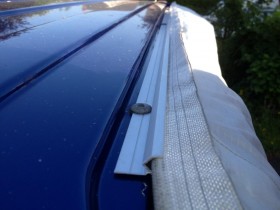
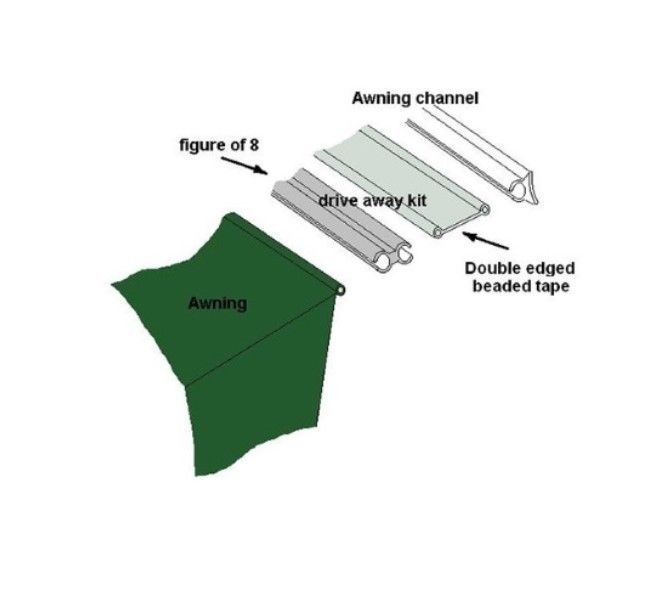
Some vans have a rail or a pre sunk channel which you can slide the 6mm beading from the edge of your awning directly into.
This is a great and easy way to attach it if you don’t plan to ‘Drive Away’ at any point ( you simply feed the awning beading into the channel before you erect it ) .
However if you do you will just need a couple of extras to enable you to unattach your awning with ease – These being the the double edged Kador Strip ( Twin Piping ) and Figure of 8 Strip shown in the diagram.

Vehicles with a Gutter Rail
It’s really easy to connect an awning if you have a gutter rail. You simply need a few lengths of Figure of 8 Tracking Strip. These are 75cm long per section so generally 3 or 4 will do the trick (depending on the length of the awning).
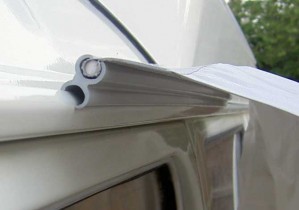
When you want to ‘Drive-Away’ you can easily unhitch (and re-attach on your return) the awning from the gutter rail.
Vehicles with a more Shallow Gutter Rail
Some vehicles (older VWs and some other older makes and models) have a more shallow gutter rail which is no good for gripping the Figure of 8 Strip. To connect your awning onto such a rail you’ll need a Vango Pole + Clamp Kit. Most awnings have a pole sleeve which runs parallel to the beading, you just slide the pole through the sleeve and clamp it onto the rail.
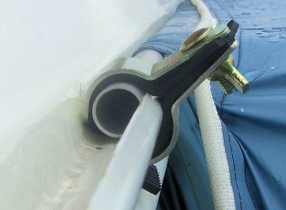
This is also a handy method if you have no rail on your van but you have parallel roof bars. You can either clamp or strap the pole to the rail.
Vehicles with Fiamma/Omnistor Wind Out Awnings Already attached
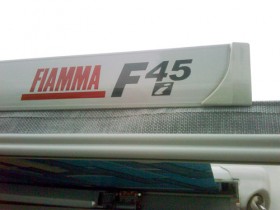
Wind Out Awnings are a great option to quickly set up and get some instant shade. But if you would like to widen your options then you can get a Drive Away Awning and attach it directly onto your Fiamma F45. Annoyingly the channels in windout awnings are 4mm, when every other awning beading is 6mm. So, to attach you will need some Figure 8 Strip and some 4mm/6mm Twin Piping.
Vehicles with a flat roof and no rail
Magnetic Strip
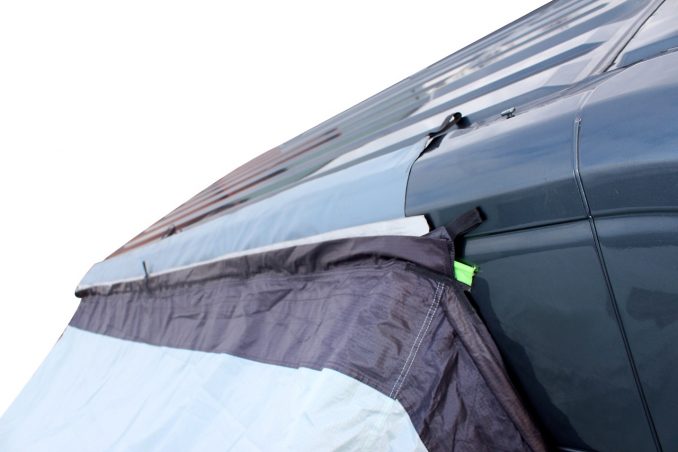
If your vehicle has no rail attached and you don’t want to attach one AND if you have a flat roof with no roof bars then you can use a Magnetic Driveaway Strip
This strip will attach to your awning with the included figure of 8 connectors and it simply slaps onto the roof of the van. If conditions are calm then this may do the job for you. If it’s windy then it’s a good idea to attach a guyline to either end (it comes with loops attached) and peg them down on the other side of your vehicle.
In the last couple of years this is fast becoming the favourite option for many campers due to it’s ease of use and because no additional van fittings are needed
If you STILL can’t fix the Awning to your van…..
We really hope you’ll have stopped reading by now and be outside attaching an awning to your vehicle….however, if none of the above are suitable for you then read on…….
Some people choose to strap the awning to any tie off point on their vehicle. You can strap, or use guylines to fix your awning to roof racks or roof bars or if you have no tie off points at all it’s possible to use some extra long spare guylines and tie it off or peg it down on the other side of the vehicle.
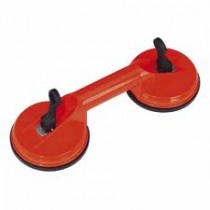
If all else fails, some of our customers have been known to use dent pullers or suction cups (we don’t sell these but they’re readily available from a quick online search). These are a handy removable means of creating a temporary fixing point to strap to or tie off or to use with the pole and clamp system.
Be Flexible!
There are so many different models of campervan and motorhome out there that yours will quite likely attach an awning different to your neighbour’s. Most custom built models will have a channel or a rail built in with an awning in mind, but some conversions won’t. So be flexible to find the best method for you…….and if you have any other tips that we haven’t mentioned above then please let us know! ( pop over to see us on Facebook, Instagram or Twitter 🙂
SHOP DRIVE AWAY AWNINGS HERE
Instructional Videos
Some companies make instructional videos of many of their products. When these are available we try to include them in our website listings as they are great for helping to visualise the size and shape of the awning, as well as tips on how to put them up.
Outwell and Easy Camp are the masters of these videos. Both companies are branches of the ‘Oase’ parent company, hence you will recognise ‘Outwell Guy’ as the expert in a lot of their slick video productions.
We’ve included a couple of these videos here both of which show a few methods of connecting an awning to the van.
How to pitch an Air Awning
How to pitch a Pole Awning
As always, if you have any questions or queries about which awning is best for you, or how to attach it to your vehicle, then please feel free to call us on 01209 203220 🙂
* For further advice on awnings CLICK HERE


