E-Newsletter Signup
For special offers, updates and news of new products join our newsletter.
GUEST BLOGGER
If you would like to contribute to our blog as a guest and can bring fresh outdoor experiences, please:
Using a Driveaway Fixing Kit
Posted in Camping Tips & Ideas / FAQs / How To / Motorhomes & Caravans on 1st October 2021
If you buy a driveaway awning and want to secure it to your vehicle, the most secure way to attach it is by using a fixing kit.
The kit allows you to easily attach and detach the awning from your vehicle to allow you to head off and explore during the day, then come back to the camp site and quickly re-connect to your van.
The fixing kit is composed of a length of kador strip with a 6mm bead on one side and either a 6mm or 4mm bead on the other side. You also get several strips of figure of 8.
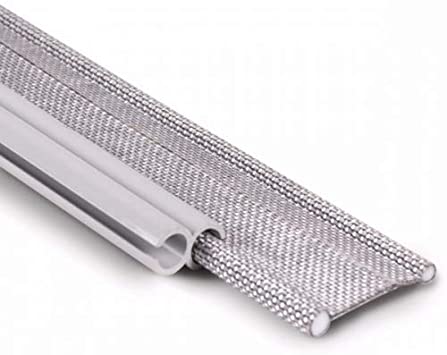
These kits are a little bit fiddly the first time you use them but become second nature. They are actually pretty straightforward once you know how to use them, however they are one of the things that seem to cause a lot of confusion and prompt a lot of questions from our customers….so we thought we would try and straighten a few things out.
Let’s keep it simple, there are 3 types of kit;
6mm x 6mm – Connects your awning to a “C” rail/channel on your van
6mm x 4mm – Connects your awning to a windout awning on your van
6mm x 6mm + 4mm – Universal kit covers both options. If you would like to keep your options open regarding what type of channel you fit to, or you simply aren’t sure, this is the one for you. It doesn’t cost much more and means it’s very difficult to go wrong being that you can fit it to a 4mm or a 6mm channel – World of Camping highly recommend getting this one. See pic below.
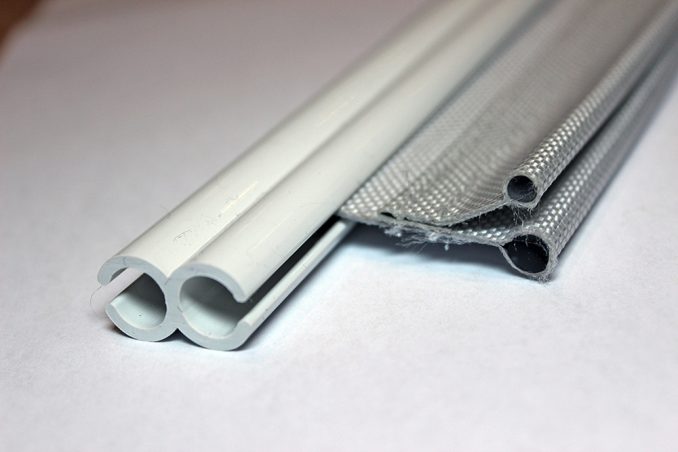
The Kits are available in 2 different lengths 220cm or 300cm.
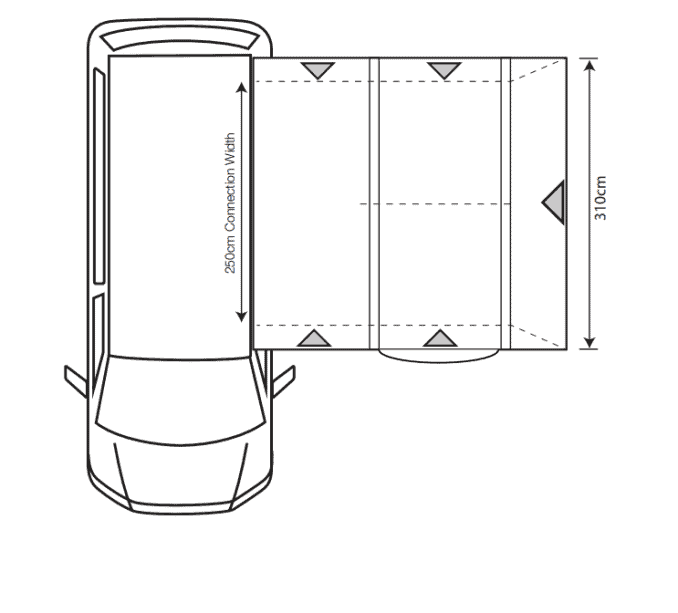
The tunnel part of your driveaway awning has a length of 6mm bead/kador attached to it. On smaller awnings this is usually just over 2 metres, on some larger awnings, it can be anywhere up to 3 metres long. This is shown in the diagram below as “connection width”
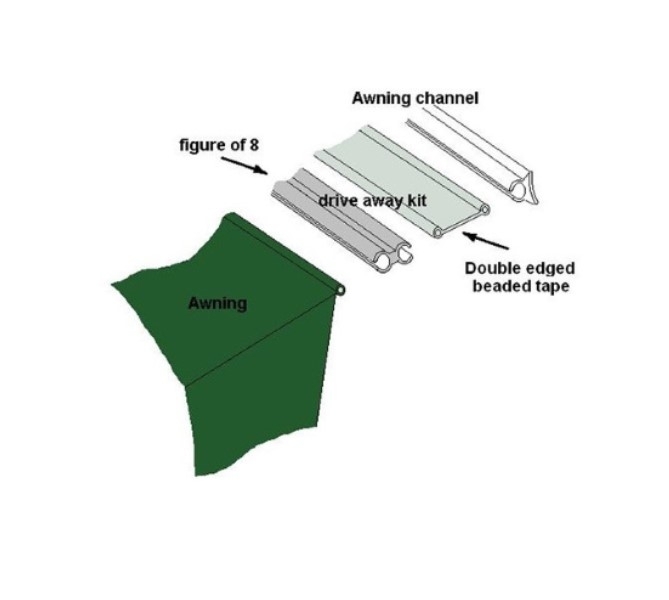
One side of the grey Kador material slides into the awning channel on your campervan or motorhome, whilst the other fits into the ‘Figure of 8’ strips which slide simply onto your awning beading. This allows you to disconnect & re-connect the awning with the vehicle in situ.
Some manufacturers list the “connection width” that you will need. If you can’t find this information or it’s not provided then just go for the 3 metre version. There’s not a great deal of difference in price and both parts of the kit can be cut down to size.
Outdoor Revolution have made a couple of extremely helpful instructional videos on how to use your fixing kit. If you are connecting your awning to a “C” rail/channel on your van then watch this one –
……and if you are connecting your Drive Away Awning to your Fiamma or Omnistor Windout Awning then watch this one –
I don’t have a “C” shaped rail, mine is more of a gutter rail, or “J” shaped rail, what do I need?
Many older campervans or van conversions, in particular VW T4s have a built in, open gutter rail. Also known as a “J” rail (see photo below) due to it’s shape, this type of rail will not take the kador strip, all you need is the figure of 8 plastic strip to connect to one of these rails. This figure of 8 is available as part of a fixing kit, as mentioned, or can be bought separately here.
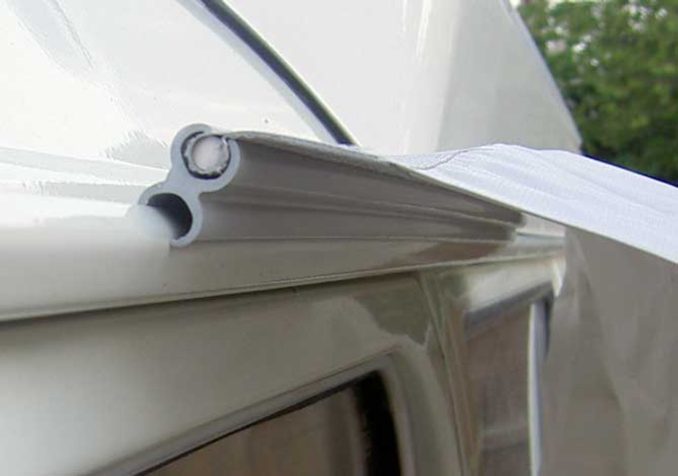
If we are out of stock of the kit you require we usually have the separate items available so you can make up your own kit. Kador Strip/Twin Piping is available to buy by the metre and Figure of 8 is available in packs of 3 x 75cm strips
We hope this helps clear up what a Drive Away fixing kit is and how it works, if you have any queries at all, please give us a quick call on 01209 203220.


